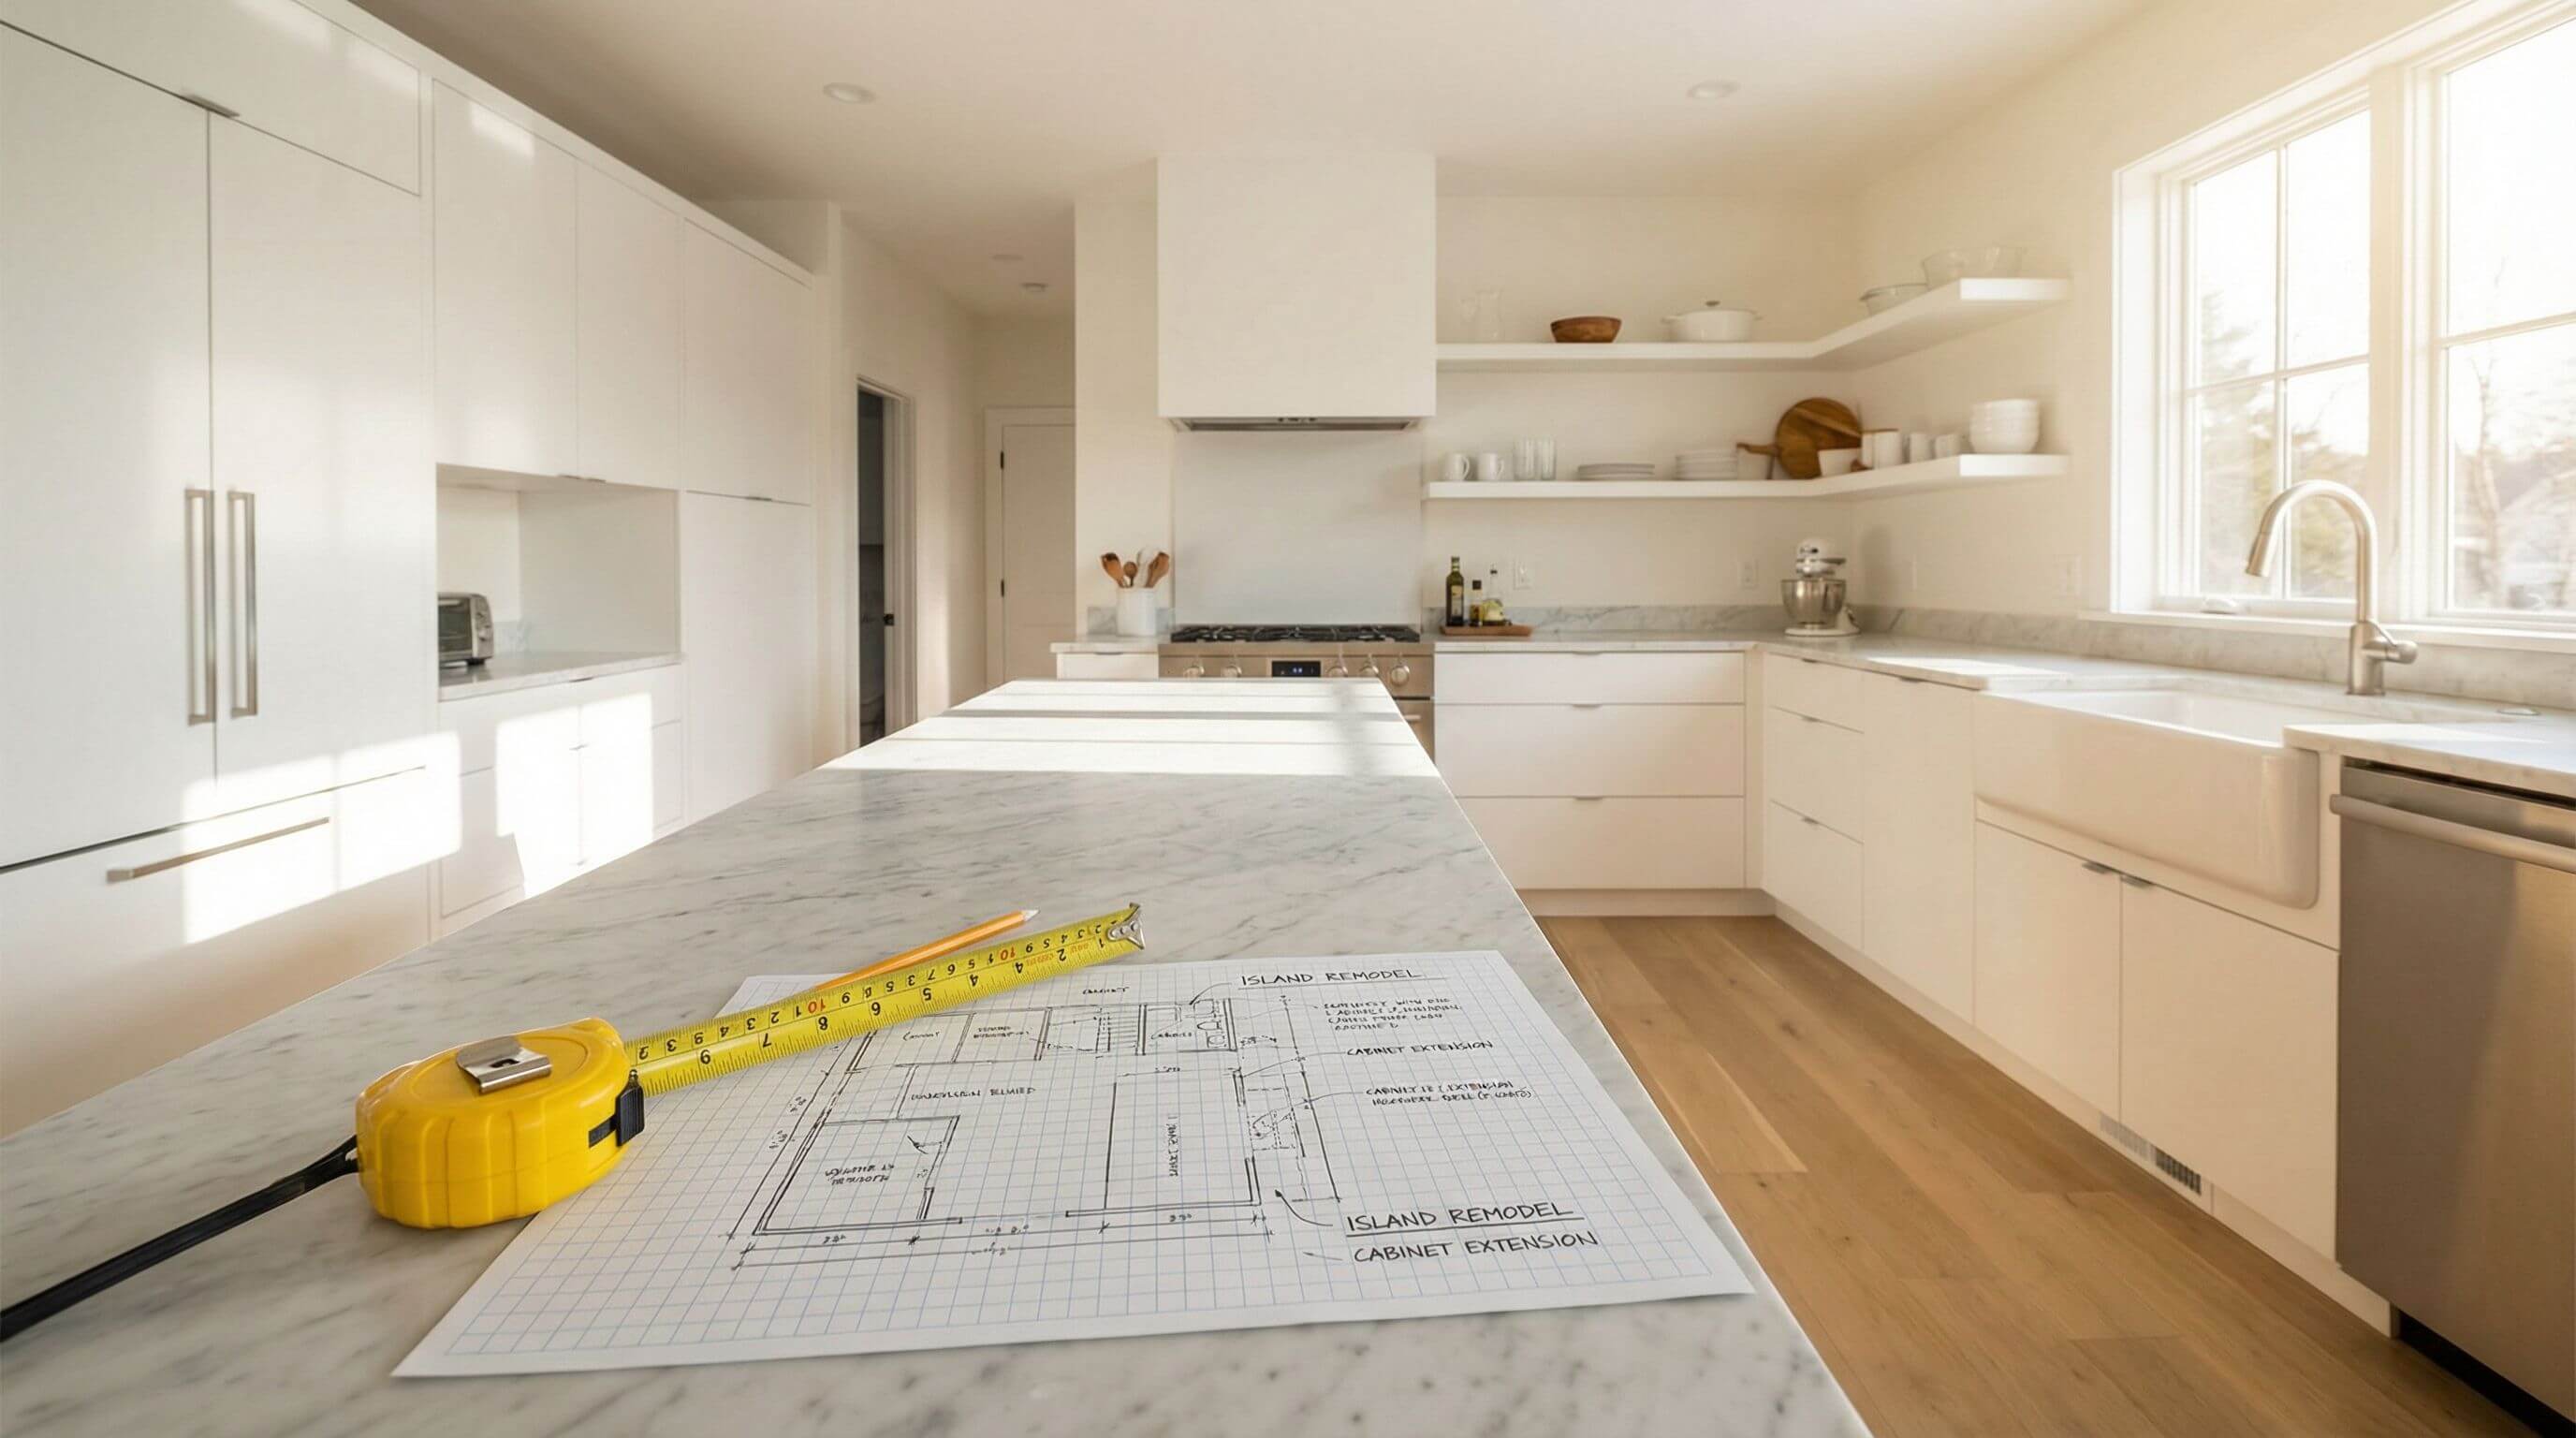
Every successful kitchen remodel starts with one thing: accurate measurements. Without them, cabinets won't fit, appliances will be misaligned, and your renovation budget can spiral out of control. Whether you're working with a contractor or planning the layout yourself, knowing how to measure your kitchen properly gives you full control over the design process.
This guide walks you through the complete measurement process, from sketching a rough floor plan to documenting every outlet, pipe, and window. And once your numbers are locked in, you can plug them directly into our 3d kitchen planner to visualize exactly how your new layout will look in 3D before spending a single dollar on materials.
Why accurate kitchen measurements matter before any remodel
A kitchen remodel is one of the most expensive renovations homeowners take on. The measurements you collect before design work begins influence every single decision, from cabinet sizing and countertop cuts to appliance placement and workflow efficiency.
Here is what happens when measurements go wrong:
- Cabinets arrive with gaps between them and the wall, or they physically cannot fit the space.
- Appliance doors collide with each other, blocking walkways and reducing usable space.
- Plumbing and electrical lines end up in the wrong position relative to the new layout, adding thousands in rework.
- Countertops need to be recut or reordered, delaying the project by weeks.
Taking 30 to 45 minutes to measure carefully up front can save you from costly change orders down the line. Professionals verify measurements at least twice, and you should do the same.
Tools you need to measure your kitchen
You do not need anything fancy. Gather these items before you start:
• A 25-foot retractable metal tape measure (cloth tapes stretch and lose accuracy).
• A pencil and eraser for annotations.
• Graph paper or plain paper for sketching.
• A step stool to reach high measurements like soffits and upper cabinet heights.
• A smartphone or camera to photograph each wall for reference later.
• A laser distance measure (optional but useful for long walls and ceiling heights).
Once you have your measurements, a digital 3D planning tool streamlines the design phase. Arcadium 3D lets you input real dimensions and build your layout visually in a browser, making it easy to test different configurations without redrawing anything by hand.
Step 1: Sketch a rough floor plan of your kitchen
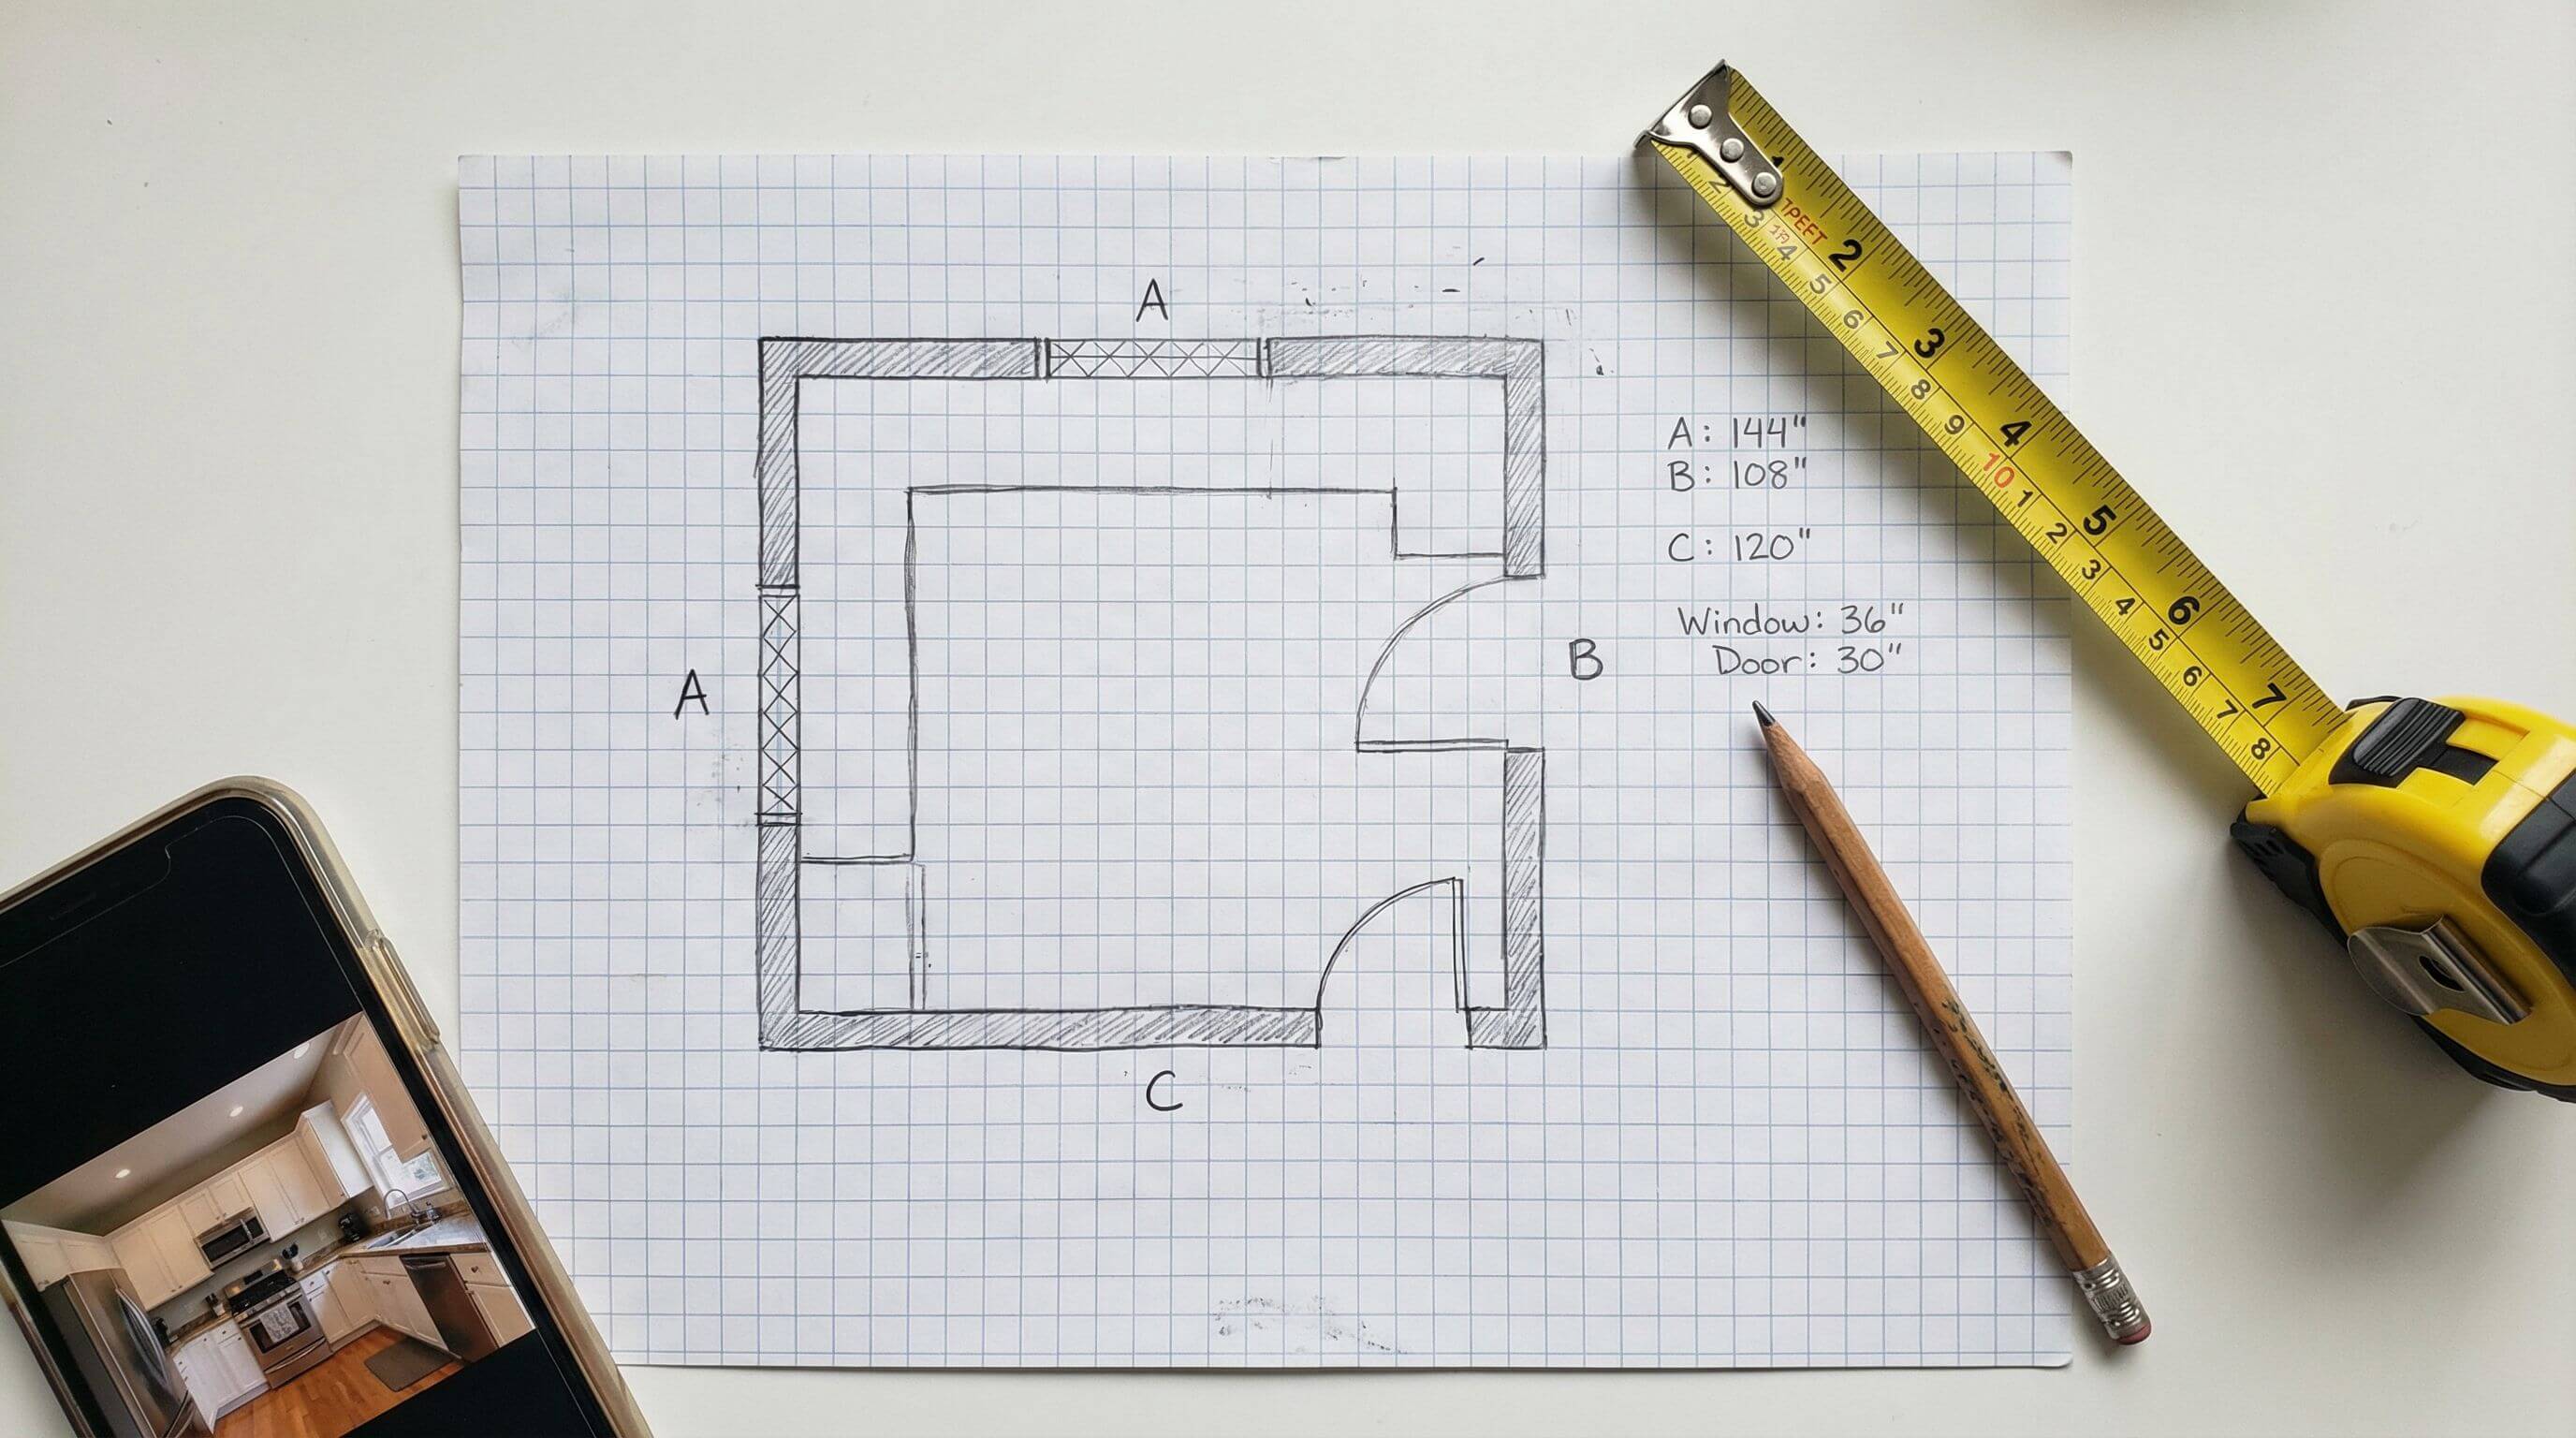
Before reaching for the tape measure, draw a bird's eye view of your kitchen. This sketch does not need to be perfectly to scale. Its purpose is to serve as a labeled reference where you can write down every measurement as you go.
Include the following in your sketch:
• The shape of the room (L-shaped, U-shaped, galley, or rectangular).
• The location of every wall, doorway, and hallway opening.
• All windows, including the direction they open.
• The position of existing appliances you plan to keep or replace.
Label each wall with a letter or number so you can match measurements to walls easily during the design stage. For example, Wall A might be the wall containing the sink, Wall B the one with the range, and so on.
Tip: Take photos of every wall alongside your sketch. When you sit down to plan the layout digitally or share dimensions with a contractor, those photos give context that a hand drawing alone cannot.
Step 2: Measure all wall lengths from corner to corner
Start at one corner and work clockwise around the room. For each wall, measure the full length from one inside corner to the next. Record all measurements in inches, not feet. Inches eliminate fraction confusion and are the standard unit used by cabinet manufacturers, countertop fabricators, and most kitchen designers.
Key points to remember:
- Hold the tape measure at a consistent height, ideally 36 inches from the floor, which is standard countertop height.
- If a wall is too long to measure in one pass, use a fixed reference point (such as an outlet or pipe) and measure in two segments that add up to the total length.
- Measure the same wall twice from both directions and compare. If your two readings differ by more than 1/4 inch, measure a third time.
Walls are rarely perfectly straight. Taking horizontal measurements at counter height captures the dimension that matters most for cabinet fitting.
Step 3: Measure windows, doors, and all openings
Every opening in the wall affects where cabinets and appliances can go. For each window and door, you need three sets of numbers:
1. The width of the opening, measured from outside edge of trim (casing) to outside edge of trim.
2. The height of the opening, measured in the same way.
3. The distance from the nearest corner of the wall to the outside edge of the trim.
For windows specifically, also measure:
• The sill height from the floor to the bottom of the window sill.
• The distance from the top of the window trim to the ceiling.
These sill and top clearance measurements determine how tall your upper cabinets can be and whether a cabinet can fit below the window.
For doorways and pass through openings, note the swing direction (which way the door opens) on your sketch. A door that swings into the kitchen can interfere with cabinet placement on the adjacent wall.
Step 4: Record ceiling height and soffit dimensions
Ceiling height determines your upper cabinet options. Measure from the floor to the ceiling at each corner of the room and at the center of each wall. Older homes often have uneven ceilings, and even a half inch difference from one corner to another can affect cabinet crown molding and filler strips.
If your kitchen has soffits (the boxed out section where the ceiling drops down above the upper cabinets), measure the following:
• Floor to soffit height.
• Floor to ceiling height (above the soffit).
• The depth the soffit projects from the wall.
Many modern remodels remove soffits to allow for taller cabinets and a more open feel. Knowing these exact measurements helps you and your designer evaluate whether soffit removal is practical and worthwhile for your project.
Step 5: Measure all existing appliances
If you plan to keep any existing appliances, measure their width, height, and depth. For appliances you plan to replace, measure the space they currently occupy so you know the maximum size that fits without layout changes.
Critical appliances to measure include:
• Refrigerator (width, height, and depth including door handles).
• Range or cooktop (width and depth including knob protrusion).
• Dishwasher (standard is 24 inches wide, but verify yours).
• Over the range microwave or hood vent (width and mounting height from cooktop).
• Built in oven or double oven (cutout dimensions, not just exterior size).
A common mistake is purchasing new appliances before measuring the space. Always finalize your kitchen dimensions first, then select appliances that fit the layout. This approach prevents the frustrating scenario of a beautiful new refrigerator that cannot fit through the doorway or stands 2 inches too wide for the allocated opening.
Step 6: Mark plumbing, gas lines, electrical outlets, and vents
Your kitchen's utility infrastructure directly impacts layout feasibility. Moving plumbing or gas lines is expensive, so documenting their exact positions upfront helps you design around them or budget accurately for relocation.
On your floor plan sketch, mark the following:
• Water supply lines and drain locations (typically behind the sink and dishwasher).
• Gas line location (behind the range or cooktop).
• Every electrical outlet, including the height from the floor.
• Light switches and overhead light fixture positions.
• HVAC vents, returns, and any ductwork running through the ceiling.
• The electrical panel location if it is inside or adjacent to the kitchen.
If a utility line is hidden behind an appliance and you cannot see it, measure to the center of the appliance instead. The line will be nearby. Your contractor or plumber can verify the exact position later during demolition.
Step 7: Check for obstructions and irregularities
Kitchens are never perfect rectangles. Before wrapping up, check for and document these common irregularities:
• Walls that are not plumb (leaning in or out). Place a level against each wall and note any deviation.
• Floors that are not level. Check with a long level or by placing a marble on the floor and watching which way it rolls.
• Pipes, radiators, or structural columns that protrude into the room.
• Bulkheads, beams, or ductwork running across the ceiling.
• Baseboards and crown molding that add thickness to walls and ceilings.
Record these irregularities on your sketch with their exact measurements. They may seem minor, but even an extra inch of baseboard thickness can throw off a tight cabinet run.
How to use your measurements with our 3D planning tool
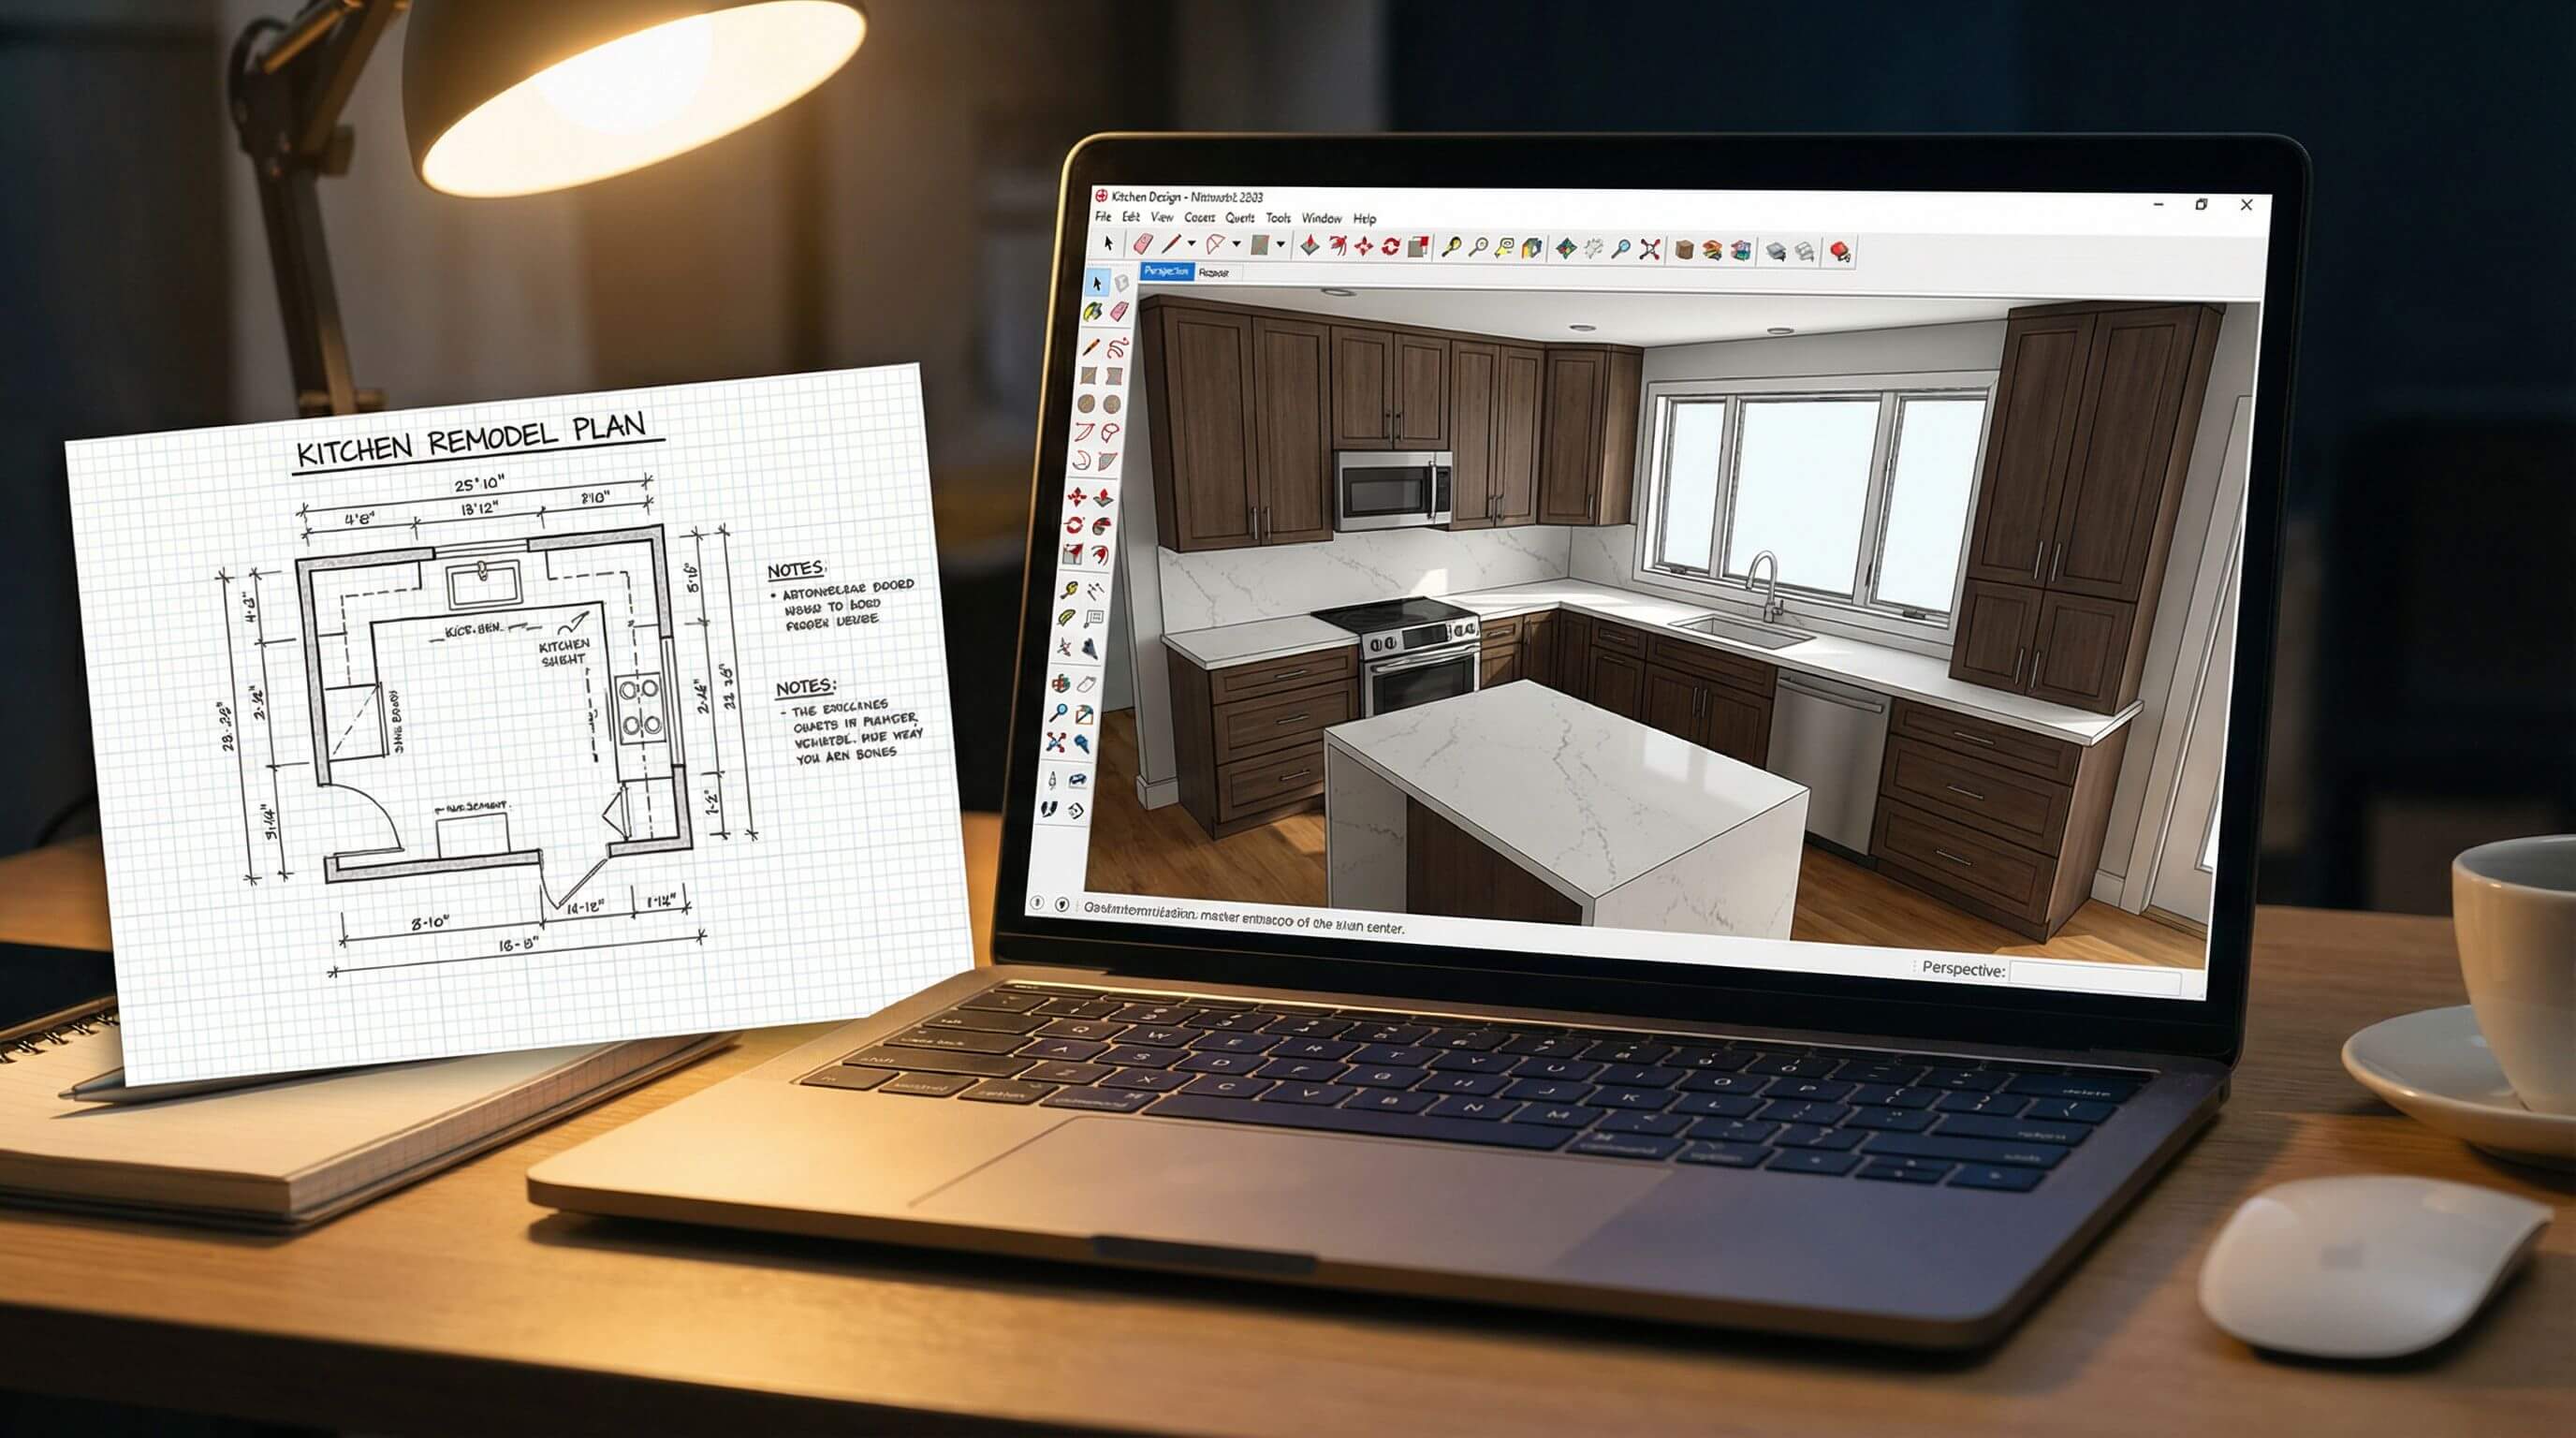
Once all your measurements are documented, the next step is turning those numbers into a visual layout. Flat 2D sketches only go so far. Seeing your kitchen in three dimensions reveals spatial relationships, clearance issues, and design opportunities that a paper floor plan simply cannot show.
This is where Arcadium 3D becomes a valuable part of your workflow. As a browser based 3D design platform, it lets you:
• Input your exact wall dimensions, ceiling height, and room shape.
• Place cabinets, countertops, and appliances in their planned positions.
• Visualize how much clearance exists between the island and the counters.
• Test different layout configurations (L shape, U shape, galley, island) in minutes.
• View the kitchen from multiple angles, including a realistic walkthrough perspective.
Unlike traditional design software that requires installation and a learning curve, Arcadium 3D runs entirely in your browser. You do not need to download anything or have 3D modeling experience. Enter the room dimensions you recorded in the previous steps, drag elements into position, and the platform generates a realistic preview instantly.
This 3D visualization step is not optional if you want to avoid expensive design mistakes. Seeing your plan rendered in three dimensions exposes problems that feel invisible on paper, like an oven door that blocks the walkway, or upper cabinets that sit too close to a window.
Common kitchen measurement mistakes and how to avoid them
Even experienced homeowners and some contractors fall into these traps:
1. Measuring to the Studs Instead of the Finished Wall- Always measure to the drywall surface, not the framing. Drywall adds about half an inch per side, which compounds across a long cabinet run.
2. Forgetting the Trim and Molding Thickness- Window and door casings protrude from the wall surface. If you measure only the opening and ignore the trim, cabinets placed next to a window may not fit flush.
3. Assuming the Room Is Square- Corners in older homes are almost never a true 90 degrees. Measure diagonally from corner to corner and compare. If the two diagonals differ, the room is out of square and your designer needs to know.
4. Ignoring Ceiling Height Variations- Ceilings can vary by an inch or more across a room. Measure at every corner and the midpoint of each wall to capture the full picture.
5. Skipping the Appliance Clearance Check- A refrigerator might fit in its alcove, but can the doors open fully without hitting the adjacent cabinet? Measure the door swing path for every appliance, not just the appliance footprint.
6. Not Documenting Utility Positions- Unmarked plumbing and electrical lines lead to surprise costs when the new layout requires them to be moved. Spending five extra minutes to measure and mark each utility location can save hundreds in unexpected change orders.
Quick kitchen measurement checklist
Use this checklist to make sure you have not missed anything before you start designing:
• Overall wall lengths (corner to corner), measured at 36 inch counter height.
• Width, height, and position of every window (including sill height and trim size).
• Width, height, and swing direction of every door.
• Ceiling height at all four corners and wall midpoints.
• Soffit dimensions (height, depth, and length) if applicable.
• Width, height, and depth of every appliance staying or being replaced.
• Location of every electrical outlet, switch, and light fixture.
• Position of plumbing supply lines, drains, and gas lines.
• HVAC vent and ductwork locations.
• Notes on out of square corners, uneven floors, and unlevel ceilings.
• Photos of every wall for reference.
With this checklist complete, you have everything needed to begin your layout in a tool like Arcadium 3D and make confident design decisions backed by real numbers.
Frequently asked questions
What unit of measurement should I use for a kitchen remodel?
Use inches for all measurements. Inches are the standard in the kitchen and cabinet industry and eliminate confusion that comes from mixing feet and inches.
How long does it take to measure a kitchen?
A thorough measurement session takes about 30 to 45 minutes for an average sized kitchen. Larger or more complex kitchens with islands and multiple openings may take up to an hour.
Can I measure my kitchen by myself or do I need a helper?
You can do it alone. A laser distance measure is especially helpful for solo measuring. However, a second person makes holding the tape measure on long walls much easier and reduces the chance of errors.
Should I measure before or after removing old cabinets?
Measure before removal. Your existing layout provides reference points for utility lines and structural elements. After demolition, your contractor will typically take a second set of measurements on the bare walls for final cabinet ordering.
How accurate do my measurements need to be?
Aim for accuracy within 1/8 inch. Cabinet manufacturers build to tight tolerances, and even a 1/4 inch error repeated across several cabinets can create noticeable gaps or fitting problems.
Is a 3D kitchen planner better than drawing on graph paper?
Yes. Graph paper works for basic floor plans, but a 3D planner like Arcadium 3D shows you depth, height, and spatial relationships that flat drawings cannot. It is especially useful for spotting clearance issues with appliance doors and traffic flow.
Do I need to measure if I am hiring a kitchen designer?
Taking your own measurements first is always recommended. A rough floor plan with dimensions gives your designer a strong starting point and saves time. The designer will then verify measurements professionally before finalizing the plan.


 Color palette generator
 Floor plan creator
 Interior design app
 Kitchen design tool
 House design software
 Landscape design software
 Bedroom design
 Office floor plan creator
 How to use Arcadium — full guide
 3D object library - free
 Articles and blog