A well-thought-out room layout can dramatically transform a space – making it more functional, comfortable, and visually appealing. The way furniture is arranged affects how a room feels and works on a daily basis. Professional designers know that great layouts don’t happen by accident; they follow tried-and-true principles to achieve a cohesive result. The overarching goal is to create “a unified whole that serves a purpose, offering comfort and convenience while looking aesthetically pleasing.
Whether you’re a homeowner arranging your living room or an interior design student planning a project, understanding these key principles of room layout design will help you make the most of any space.
In this guide, we’ll break down the fundamental principles – from ensuring the room meets your needs to balancing visual elements. These guidelines are both practical and instructional, meant for everyday decorators like homeowners or renters and also useful for budding interior designers. Let’s dive into the core concepts that underpin effective room layouts.
Check Out Room Layout Designer
1. Define the Room’s Purpose and Function
Every successful room layout starts with a clear understanding of purpose. Before moving furniture around, step back and ask: What is this room primarily used for? Defining the function of the space will guide all your design decisions
For example, a living room might be designed around conversation and entertainment, a dining room centers on eating, and a bedroom is oriented toward rest. If a room serves multiple functions (such as a studio apartment acting as living area, office, and bedroom), identify the main activities and consider subdividing the space into zones for each purpose.
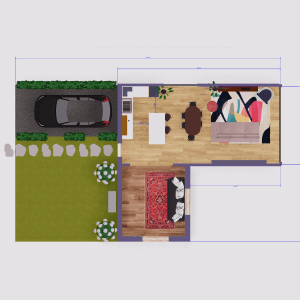
Professional designers often leverage modern tools like
Arcadium 3D
to envision layouts tailored to a room’s function from the start. Knowing the primary use of the room helps determine the “anchor” pieces of furniture and their placement. In a living room, the anchor might be a sofa facing a TV or fireplace; in a home office, it’s the desk positioned for good lighting. Keep the primary function in focus and ensure key furniture supports that use.
For instance, if you watch TV every night, make sure the seating and TV are arranged for comfortable viewing – no matter how stylish another setup might look. Likewise, don’t place a dining table so far away or awkwardly that carrying food to it becomes a hassle. By prioritizing function, your layout will naturally become more convenient and livable.
2. Plan for Easy Traffic Flow
A space can only be truly functional if people can move through and within it comfortably. That’s why planning for clear traffic flow is a cornerstone of room layout design. Consider how someone enters the room and walks to different areas: the path should be obvious and unobstructed. Ensure there’s enough space between furniture for people to pass without sidling or bumping into things.
As a rule of thumb, leave at least 36 inches (3 feet) of clearance for main walkways. In busy areas or larger rooms, 42–48 inches of width is even better. This gives everyone ample room to navigate, preventing the space from feeling cramped or hazardous.
Pay special attention to doorways and entry points – nothing should block a door from fully opening, and the entry route should lead naturally into the room’s main area. Within the room, think about the routes to commonly used spots: can you easily walk up to the sofa and sit down? Is there a direct path to the closet or desk you use daily, or do you have to zigzag around furniture?
For example, walking around a bed to reach a frequently-used dresser or desk will quickly become tiresome if you do it every day. Arrange key pieces so that they’re accessible without obstacle. If your living room has a patio door, don’t block it with a chair. In a dining room, make sure there’s enough space to slide chairs out and walk around the table. Good circulation flow not only makes a room more functional, it also contributes to an open, inviting feel.
(Tip: When laying out a furniture plan, it can help to sketch the room or use a digital planner to map clear pathways. Many people now try a room layout design free tool online to visualize traffic flow, moving pieces around until the circulation feels right.)
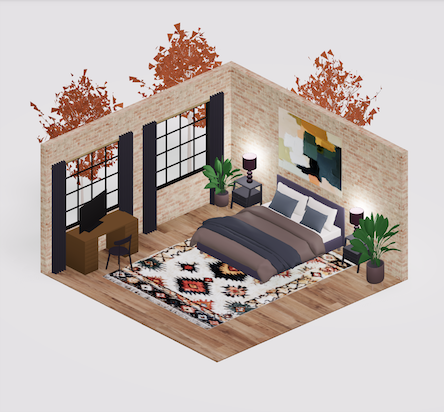
3. Establish a Focal Point
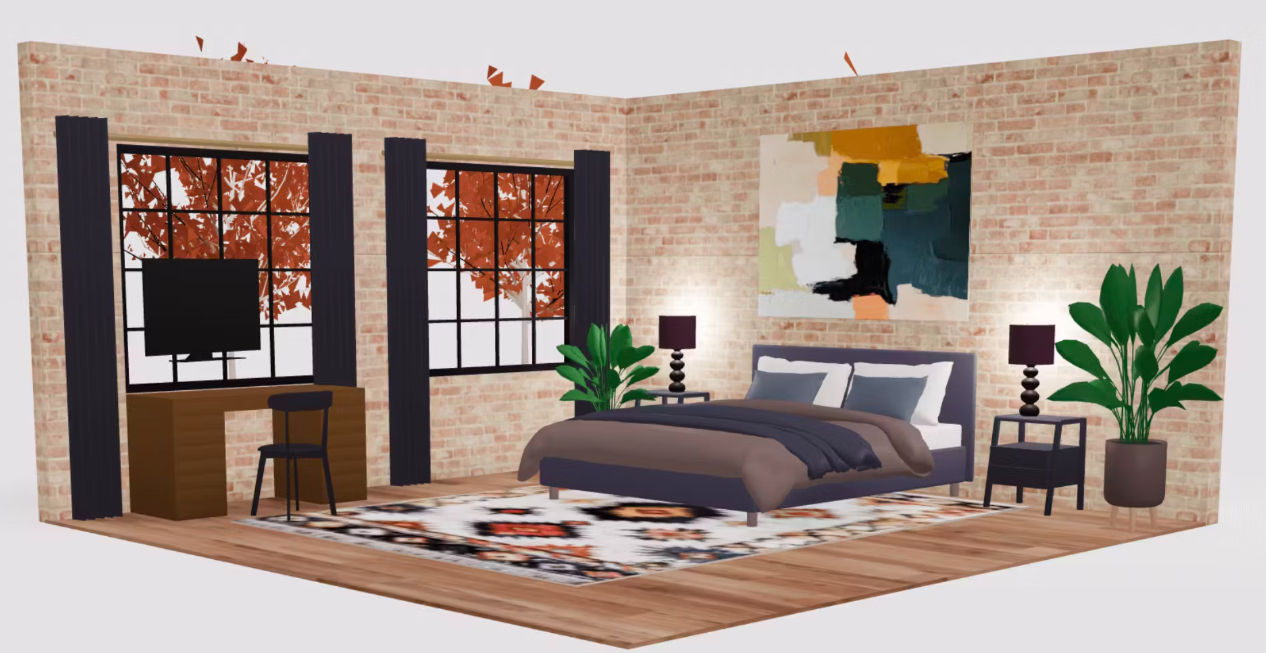
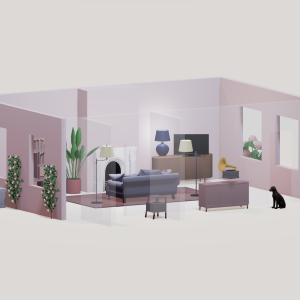
Most well-designed rooms have a focal point – a feature that naturally draws the eye and around which the furniture is oriented. Identifying and emphasizing the focal point is a key principle of layout design. This focal element could be an architectural feature like a fireplace or a picture window with a view, or it might be a piece of furniture or art such as a media console with a TV, a large painting, or a bed headboard.
Once you’ve identified the main focal point, arrange the primary seating and furniture to face or highlight it. For instance, in a living room, you might position the sofa and armchairs so they face the fireplace or TV. In a bedroom, the bed (often the headboard wall) becomes the focal point that everything else complements.
If a room lacks a natural focal point, you can create one. A bold artwork, an elegant light fixture, or a well-styled bookshelf can serve as a deliberate focal point to anchor the layout. The important thing is to avoid having multiple items competing for attention. While some rooms have more than one potential focal point (imagine a family room with both a fireplace and a large television on different walls), it’s usually best to prioritize one.
Choose the dominant feature to emphasize, and arrange the layout to make it prominent, while downplaying the secondary feature. For example, you might center seating toward the fireplace and place the TV off to the side or at a lower visual level, so the fireplace still takes center stage. By orienting the layout around a clear focal point, you create a sense of purpose and coherence in the space – the room feels intentionally designed and draws people naturally to its best feature.
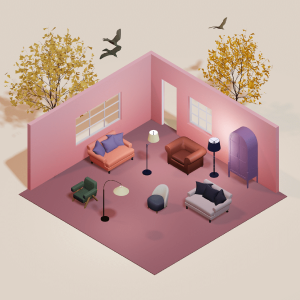
4. Achieve Balance and Harmony
A pleasing room layout feels balanced – meaning no side of the room appears “heavier” or overly cluttered compared to the other. Balance in interior design can be symmetrical (formal) or asymmetrical (informal), but in both cases the goal is a harmonious distribution of visual weight. To achieve this, consider the size and placement of each piece of furniture. Large, bulky pieces all clustered on one side of a room will make that side feel weighty and the overall space unbalanced.
Instead, spread out substantial items or counterbalance them with groups of smaller pieces so the room feels even. For example, if a big sectional sofa dominates one side of the living room, you might balance it across the room with a pair of chairs or a bookshelf on the opposite side.
In a symmetrical approach, you might place matching chairs on either side of a couch or identical nightstands flanking a bed for an even, mirror-image look. In an asymmetrical approach, the items aren’t identical but still equal in visual weight – say, a floor lamp and side table on one side of a sofa balanced against a tall plant on the other.
Harmony goes hand-in-hand with balance. It refers to how all the elements in the room work together aesthetically. A harmonious layout means the style, scale, and placement of furnishings feel like they belong in the same story. One trick to maintain harmony is to coordinate furniture heights and shapes so nothing sticks out awkwardly.
For instance, the backs of all your seating pieces in a living area should be within a similar height range, so no single chair towers over a low sofa (which would look out of place). Also, relate pieces to each other — a lone accent chair floating by itself will seem disconnected, but pulled closer to a sofa with a side table and lamp, it becomes part of a pleasing ensemble.
When selecting and arranging furniture, keep an eye on creating groupings and pairings that look intentional. The concept of grouping is so important that designers often advise against “one-off” pieces that sit isolated. Every seat should have a companion piece (like a small table or lamp) to tie it into the rest of the layout. By balancing the room and harmonizing the decor, you ensure the space feels stable and inviting, never lopsided or jarring.
Check Out Room Layout Designer
5. Use Appropriate Scale and Proportion
Closely related to balance is the principle of scale and proportion. This is all about choosing furniture that is the right size for the room and arranging it in a way that feels proportional. A common mistake is selecting pieces that are too large for a given space – like an oversized couch crammed into a tiny den, or a king bed dominating a small bedroom leaving no room to walk.
Conversely, very small furniture can feel lost and ungrounded in a very large room. To get scale right, consider not just individual items but how they relate to each other and to the room’s dimensions. As a guideline, taller ceilings can accommodate taller furniture or stacked art, whereas low ceilings call for lower profiles. In terms of proportion, designers often use the two-thirds rule (derived from the golden ratio) to create pleasing relationships.
For example, if you have a long wall, try to fill roughly two-thirds of it with a main piece of furniture such as a sofa or console, rather than stretching something across the entire wall or using something very small. A sofa might ideally be about two-thirds the length of the wall it’s placed agains, and a coffee table might be about two-thirds the length of that sofa. These ratios tend to feel right to the eye and avoid awkward empty gaps or overstuffed walls.
Also pay attention to furniture height and bulk. If your room has one very tall wardrobe or bookshelf, balance its scale with another tall element or a cluster of items so it doesn’t stick out oddly. Ensure that major seating pieces (couch, chairs) are relatively proportional to each other in size – a tiny accent chair next to a massive sectional will seem out of scale.
Likewise, don’t use a dinky 5×7 rug under a grouping of large sofas; the rug should be big enough to at least tuck under the front legs of all seating to tie the area together. By keeping scale in check, you maintain a comfortable sense of space. Remember that empty space is also part of scale – a room crowded to the brim with furniture (even if each piece individually fits) will feel small and overwhelming.
It’s often better to use slightly fewer pieces than to jam in extras, so the room’s proportions feel open and breathable. As one design rule of thumb states: almost every home could benefit from removing one or two pieces of furniture from each room – a nod to the idea that less can be more when achieving ideal proportion.
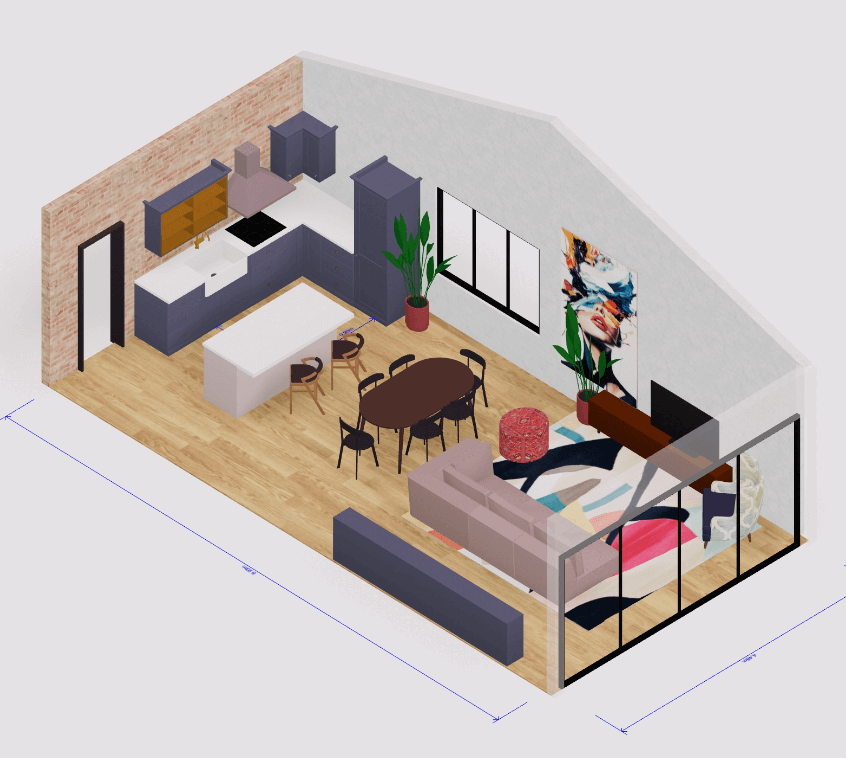
6. Create Groupings and Zones
Rather than lining every piece of furniture against the walls, aim to create inviting groupings of furniture that relate to each other. In most rooms, especially medium to large ones, pulling seating and tables toward a center point can make the space feel more cohesive and cozy. For example, in a living room, you might form a conversation area by arranging a sofa and a couple of chairs around a coffee table away from the walls, forming a central cluster.
This “floating” arrangement (with the back of the sofa perhaps a few inches from a wall or even fully in the room) prevents the design from feeling like everything is plastered to the room’s edges. The goal is to have furnishings interact as a unified set, rather than a disjointed ring around the perimeter. Once you’ve established a main seating zone, you can still utilize wall space for secondary pieces – for instance, a console under a window or a reading chair in a corner – but these should complement the central area or create purposeful sub-areas, not distract from it.
In open-concept layouts or very large rooms, you may actually divide the space into multiple zones. For instance, one end of a big living room might serve as the TV watching area, while another corner becomes a reading nook with a comfy chair and lamp. In a studio apartment, area rugs and furniture arrangement delineate a “living room” zone versus a “bedroom” zone.
Just ensure each zone has a clear function and a sense of grouping (use furniture, rugs, or lighting to define each area). On the flip side, in a very small room, you might not have the luxury of floating furniture in the middle – the furniture might indeed hug the walls. In that case, you still want to arrange those pieces so they form a connected grouping (perhaps all seating faces a common coffee table or entertainment center).
The key is coherence: chairs, tables, and sofas should feel intentionally placed with each other. Every seat should have a table within reach, every grouping should make conversational or functional sense. By organizing furniture into thoughtful groupings or zones, you create order and intimacy in the layout, making the room both more functional and aesthetically pleasing.
7. Don’t Overcrowd – Leave Breathing Space
In room layout design, restraint is as important as action. It can be tempting to fill every corner with furniture or decor, but negative space (empty space) is vital for a layout to breathe. Knowing when to stop adding is a skill that separates amateur layouts from professional-looking ones. After you’ve placed your essential furniture pieces, take a step back and evaluate: is there sufficient open space around and between items?
Each piece should have a little elbow room so it can be appreciated without being jammed against something else. Cluttering a space with too many furniture pieces or accessories not only makes it hard to move (violating the traffic flow principle) but also diminishes the impact of each item. For instance, a beautiful accent chair won’t be noticed if it’s squeezed between a side table, a plant stand, and a bookshelf all in one corner.
Strive for a balance between filled space and open space. A common recommendation is to start with your critical pieces and stop when you’ve achieved the functional needs; then edit out any extraneous items that don’t serve a purpose or that crowd the composition.
In fact, many designers suggest that most rooms look best when you remove a couple of items after your initial setup. That might mean leaving one wall free of furniture, or having a clear area by a doorway, or simply not using that extra chair if it makes things tight. Remember, “an overcrowded space is not charming or eclectic… it takes away from the beauty of the pieces that belong”. Your eye (and your guests) need a place to rest.
By paring back and giving important pieces some breathing room, you actually emphasize the design and make the room more inviting. In practice, this could be as simple as ensuring there’s open floor space in the center of a room for easy movement, or clear corners that don’t accumulate miscellaneous furniture. The result will be a cleaner, more spacious look that highlights your carefully chosen layout.
8. Test and Refine the Layout
Designing a room layout is often an iterative process – rarely perfect on the first try. A great principle to remember is to test your layout and be willing to refine it. This might involve physically moving furniture around and living with the arrangement for a few days, or easier yet, experimenting with a scale drawing or a digital room planner.
Take measurements of your space and your furniture, and consider making a simple sketch or using an app to try different configurations. By visualizing changes before committing, you might discover a setup that works better than your initial idea.
For example, you might realize the armchair fits nicer angled in a corner rather than flat against a wall, or that swapping the locations of two pieces opens up a better pathway. Don’t hesitate to push pieces around to see how it feels – sometimes even small adjustments (like shifting a sofa one foot to the left) can improve symmetry or flow.
Modern technology has made refining layouts much easier. You can use virtual design tools to preview your room in 2D or 3D, saving lots of heavy lifting. This is where platforms like Arcadium 3D come into play for both professionals and DIY designers. By creating a digital model of your room, you can drag and drop furniture, rotate pieces, and even do a virtual walkthrough to test sight lines and walking paths.
Does the room still feel open when you add that extra chair? Is the artwork centered when viewed from the entry? These are questions you can answer in a virtual mockup before finalizing the real layout. Always remember that layout guidelines are guidelines, not strict rules – every space and household is different.
The best layout is ultimately one that you find comfortable and functional. So use principles as a starting framework, but tweak and adjust until the room feels just right for you. By testing and refining, you’ll arrive at a layout that truly optimizes your space’s potential.

Transform Your Space with Arcadium 3D
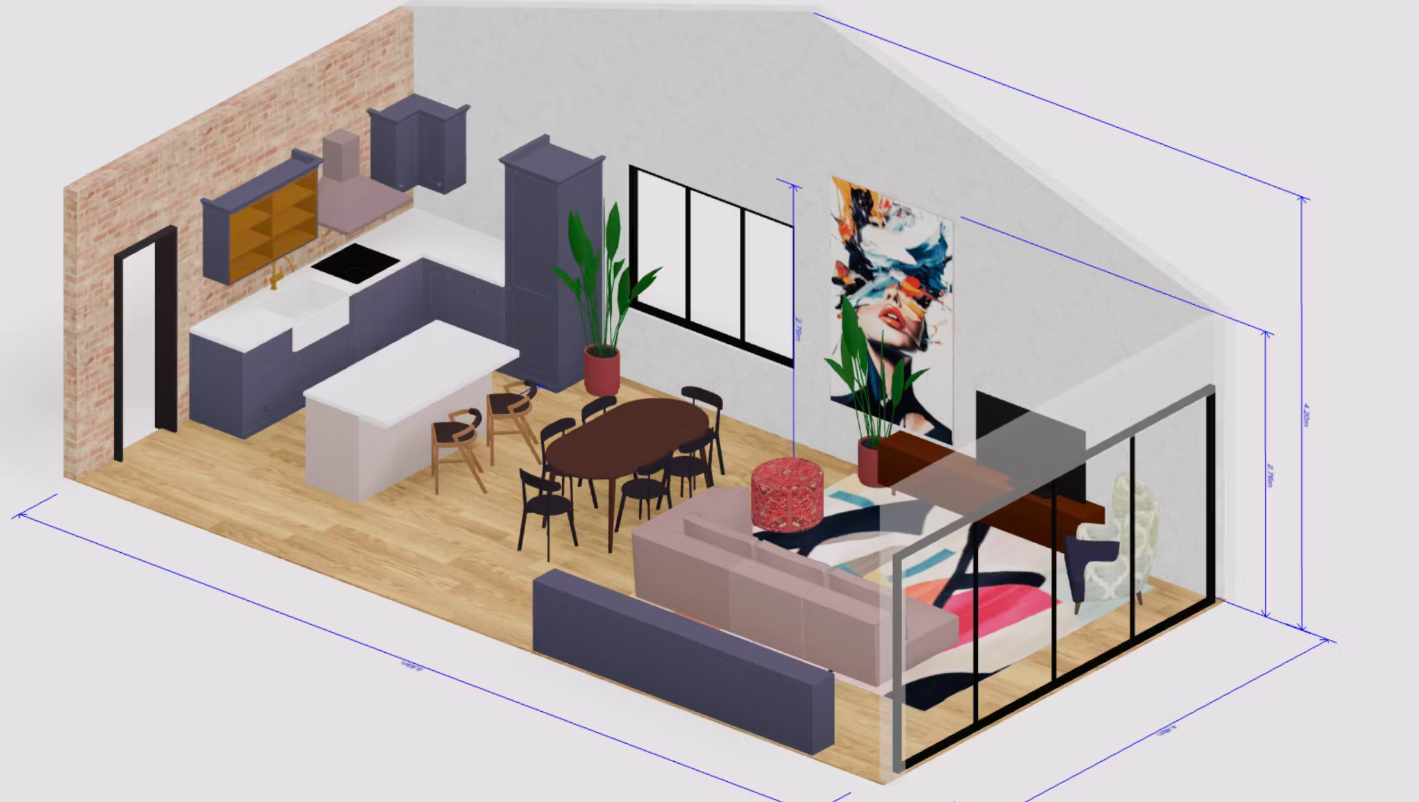
After covering the key principles, you might wonder how to effectively apply them to your own room design. This is where Arcadium 3D comes in as a game-changer in room layout design. Arcadium 3D is a powerful yet user-friendly online platform that allows anyone – not just professional designers – to create and visualize room layouts in stunning 3D.
In the past, transforming a layout from concept to reality meant sketching floor plans by hand or pushing heavy furniture around. Arcadium 3D puts pro-level design tools at your fingertips, enabling you to virtually craft your space before lifting a single piece of furniture. It’s essentially a digital sandbox for your interior ideas, and it’s free to get started right in your web browser.
Using Arcadium 3D
, you can map out your room’s dimensions accurately and then drag-and-drop furniture and decor from an extensive built-in library. The software is equipped with dynamic, parametric components, which is a fancy way of saying you can adjust furniture pieces to the exact size you need and the model automatically adapts (stretching a table longer, resizing a sofa, etc., without distorting the look).
This means you can ensure everything fits to scale – a critical aspect of respecting proportion and avoiding layout mistakes. Want to see if a king bed overwhelms your guest room or if a different couch would better balance the living room? Arcadium lets you swap, resize, and rearrange with a few clicks.
The real-time 3D view allows you to do a virtual walkthrough of the room, so you can test the flow and sight lines just as if you were standing there. Move a chair and immediately “walk” through the space to see how it opens up the pathway – it’s an intuitive way to apply the traffic flow principle in practice.
Arcadium 3D also helps with visualizing focal points and decor styles. You can rotate the camera view to ensure your chosen focal point (be it a fireplace, TV, or artwork) is visible and emphasized from key vantage points. The platform even integrates AI-powered visualization: at any moment you can generate realistic renderings of your layout or experiment with different interior design styles virtually.
This is a huge advantage when trying to achieve harmony – you can preview colors, lighting, and furnishings together to see if everything feels cohesive before committing. Another benefit is the ability to share your design easily via a link, allowing you to get feedback from family, roommates, or clients. In a collaborative scenario, multiple ideas can be tried without any demolition or heavy lifting, accelerating the design process.
Perhaps the most transformative aspect of using Arcadium 3D is that it empowers anyone to be a designer. You don’t need formal training to sketch floor plans to scale or draw perspectives – the tool handles the technical details, so you can focus on creativity and applying the principles we discussed.
It’s like having a digital canvas of your room where you can play around with layout options risk-free. By the time you finish in Arcadium, you’ll have a clear plan for your real space and confidence that everything will look and fit as intended.
In short, Arcadium 3D bridges the gap between understanding design principles and executing them. It helps turn abstract ideas about balance, flow, and proportion into concrete layouts that you can see and walk through.
With such technology, the process of designing a room layout becomes not only easier and more precise but also genuinely fun – it’s incredibly rewarding to watch your once empty or awkward space transform into a harmonious design right on your screen. Armed with the principles above and tools like Arcadium 3D, anyone can create a room layout that is both beautiful and functional.
Learn More About: What Is a 3D Room Planner and Why You Need One for Your Next Project
Frequently Asked Questions - Arcadium 3D
Q: How do I start designing a room layout?
Begin by clarifying the room’s primary purpose. Identify what activities will take place there (e.g., relaxing, working, dining) and choose your main furniture piece (such as a sofa, bed, or desk) to support that function. Place that anchor piece first according to the focal point or natural best location in the room. From there, build out the layout, keeping traffic flow and balance in mind.
Q: How much space should I leave between furniture for walkways?
Aim for about 3 feet (approximately 36 inches) of clear space for main walkways through a room. This width allows most people to pass through comfortably. In tighter spaces you might get away with 2 feet (24 inches) in a pinch, but 3 feet is a good standard to ensure the room doesn’t feel cramped. Around dining tables or in hallways, even a bit more (3.5–4 feet) is ideal for good circulation.
Q: Should I push all my furniture against the walls to make the room seem bigger?
Not necessarily. While pushing furniture against walls can open up central floor space, it can also make a room feel uninviting or sparse. Often, pulling seating arrangements inward (away from walls) creates a cozier, more cohesive area for conversation or activity. Even just a few inches of gap between furniture and walls can prevent a cramped look and improves airflow. In very small rooms you may have no choice but to use the walls, but try to arrange pieces so they form an intimate grouping rather than a perimeter hug.
Q: What is a focal point and what if my room doesn’t have one?
A focal point is the standout feature of a room that draws your attention – for example, a fireplace, a big window, a TV, or a striking piece of art. It’s the element that anchors the layout and around which you orient furniture. If your room doesn’t have an obvious focal point, you can create one. Consider adding an eye-catching artwork, an accent wall color, or a stylish furniture piece (like an elegant headboard or an entertainment center) to serve as the room’s focal point. Then arrange your seating or layout to face or emphasize that feature.
Q: Are there any free tools to help me plan a room layout?
Yes, there are several
f
ree
interior design
and floor plan tools available. One of the most robust options is Arcadium 3D, a free browser-based room design tool. It allows you to create a 3D model of your space, add and arrange furniture, and even walk through the design virtually. Using a tool like this can save you time and guesswork – you can experiment with different layouts, colors, and decor without any cost. Other options include basic room planner apps or even graph paper and cut-out furniture shapes for a low-tech approach, but a tool like Arcadium 3D offers a much more realistic and interactive experience for free.
Check Out Room Layout Designer


 Color palette generator
 Floor plan creator
 Interior design app
 Kitchen design tool
 House design software
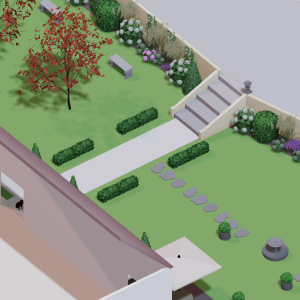 Landscape design software
 Bedroom design
 Office floor plan creator
 How to use Arcadium — full guide
 3D object library - free
 Articles and blog